Halloween’s most dramatic color combination is calling your name! Black and red nail designs create the perfect spooky-chic look that’ll have everyone asking where you got your nails done. Whether you’re channeling vampire vibes or going for gothic glam these striking shades work together to deliver maximum Halloween impact.
We’ve discovered that black and red manicures aren’t just for October – they’re versatile enough to rock year-round while still capturing that mysterious Halloween essence. From blood-drip effects to elegant ombre fades these colors create endless possibilities for your next nail appointment.
Ready to transform your fingertips into Halloween masterpieces? We’re diving into the most stunning black and red nail designs that’ll make your manicure the star of every Halloween party and beyond.
Classic Gothic Black and Red Halloween Nail Designs
Gothic elegance meets Halloween drama in these timeless black and red nail art styles. These sophisticated designs capture the essence of dark romance while maintaining an air of mystery perfect for the spooky season.

Package Contents:You will get 1 sheet funny face nail art stickers for acrylic nails supply. Many lovely patterns of the gothic nail art stickers for you to choose from, colorful design, to meet your rich imagination of nail DIY. These are suitable for acrylic nails

Package Included: Our Halloween nail stickers feature have terror and scary designs. including spider, spider webs, skeleton, devil, bat, snake, etc pattern, which can provide you with a variety of choices, so that you can create your own Halloween nail art

Black Nail Stickers➤7 sheets of black goth witchy nail stickers give people an intuitive and advanced exquisite feeling, and satisfy your rich imagination of nail DIY designs.
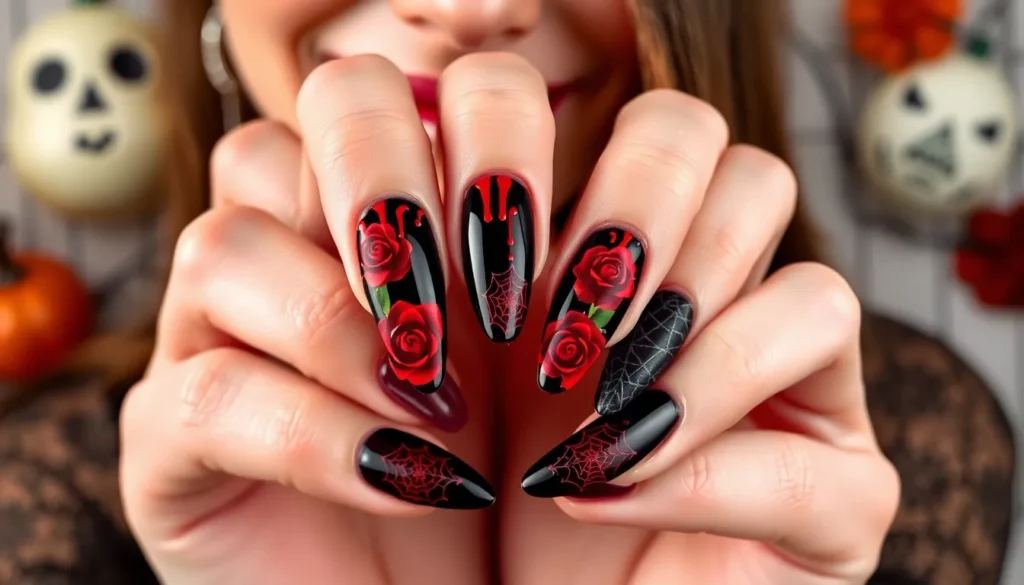
Vampire-Inspired Blood Drip Nails
Creating vampire blood drip nails starts with a deep black base coat that serves as your canvas for dramatic effect. We recommend applying two thin coats of black polish to achieve full opacity and a smooth finish. Once dry, use a thin nail art brush or toothpick to create realistic blood drips by starting at the cuticle area with dark red polish.
Building the blood effect requires layering different shades of red for authenticity. Start with a burgundy or wine red color for the base drip, then add touches of bright red for fresh blood appearance. The key lies in making each drip irregular and organic looking rather than perfectly uniform.
Sealing your vampire inspired design with a glossy top coat enhances the wet blood appearance. This technique works exceptionally well on stiletto or coffin shaped nails where the length emphasizes the dripping motion. For added drama, consider applying small rhinestones or glitter accents to mimic blood droplets catching light.
Gothic Rose and Thorn Patterns
Gothic rose designs combine the beauty of floral art with dark Halloween aesthetics. We suggest starting with a matte black base and using deep red polish to hand paint or stamp rose silhouettes. The contrast between the dark background and rich red roses creates stunning visual impact.
Detailing your roses with thin white or silver lines adds dimension and gothic flair to the design. Use a fine tip brush to outline petals and add subtle highlights that make the roses appear to emerge from the darkness. This technique works particularly well when you vary the rose sizes across different nails.
Thorn elements complete the gothic rose theme by adding an edge of danger to romantic florals. Paint curved thorn vines using black polish over red sections, or create negative space thorns by carefully removing polish with a cleanup brush. These details transform sweet roses into something mysteriously beautiful and perfectly Halloween appropriate.
Dark Victorian Lace Details
Victorian lace nail art captures the elegance of bygone eras with intricate patterns and delicate details. We recommend using nail stamping plates specifically designed with lace patterns, as they provide consistent results and professional looking detail. Apply your base color first, then stamp the lace design using contrasting polish.
Layering different lace patterns creates depth and authentic Victorian complexity. Start with larger lace motifs as your foundation, then add smaller detailed patterns on top using a different shade. This technique mimics how actual Victorian lace was often layered for formal occasions and mourning attire.
Finishing your Victorian lace design with strategic placement of small pearls or crystals elevates the sophisticated appearance. Focus on intersection points within the lace pattern where embellishments would naturally occur. The combination of black lace patterns over deep red bases, accented with white or silver details, perfectly captures the gothic Victorian aesthetic ideal for Halloween elegance.
Spooky Spider and Web Black and Red Halloween Nail Designs

Spiders and webs create the perfect spine-chilling elements for your black and red Halloween manicure. These classic Halloween motifs transform your nails into eerie masterpieces that capture the essence of the spooky season.
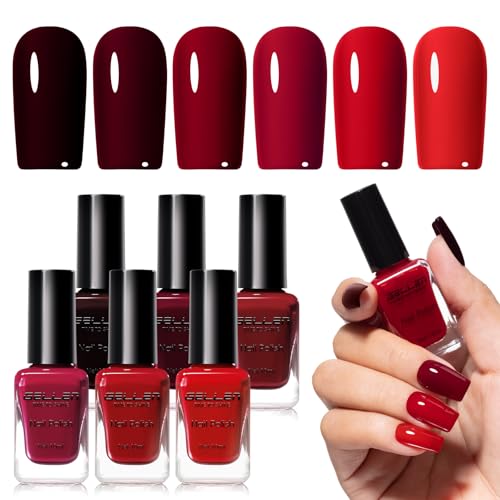
Rich Red Color Palette: 6 trending shades including wine red, blood red, cherry red and burgundy for sophisticated autumn/winter looks

Package Contains:You will receive 24 Pcs Halloween fake nails,1 nail file,1 small wooden stick,and 24pcs jelly glue stickers.The almond press on nails are divided into 12 different sizes,It is convenient for you to choose the press on nails medium that suit your nail

Beetles Scorpio-Inspired Midnight Vampire Theme: Inspired by Scorpio’s mysterious and powerful energy, this Midnight Vampire gel nail kit blends gothic elegance with dark romance. Black, purple, burgundy, and deep red shades create a bold, seductive manicure that feels confident, magnetic, and unforgettable.
Black Widow Spider Accent Nails
Black widow spiders make striking focal points on Halloween nails with their distinctive red hourglass markings. We recommend painting detailed black spiders using fine brushes and gel polish to achieve precise, professional-looking results. The iconic red hourglass shape stands out beautifully against black or deep red backgrounds, creating an instantly recognizable Halloween symbol.
Creating these accent nails requires patience and steady hands for the intricate spider details. Paint the spider’s body first using black gel polish, then carefully add the characteristic red hourglass mark on the abdomen. Fine nail art brushes, particularly those from Robin Moses collections, help capture these detailed elements with exceptional precision. Accent one or two nails per hand with these spiders while keeping the remaining nails in complementary solid colors for balanced visual impact.
Red and Black Spider Web Gradients
Red and black gradient effects create haunting ombre bases that resemble twilight fading into darkness. These gradients serve as perfect backdrops for delicate spider web designs painted in contrasting colors. Blending techniques start with deep red at the cuticle area and gradually fade to black at the nail tips, or vice versa for different dramatic effects.
Spider webs painted over these gradients add intricate detail and visual depth to your Halloween manicure. Use fine filigree lines in white or silver to create the web patterns, ensuring they stand out against the gradient background. The layered effect enhances the overall design complexity while maintaining the spooky Halloween aesthetic. Both natural and gel nails work well for this technique, though gel polish provides longer-lasting color intensity.
3D Spider Web Nail Art Techniques
Three-dimensional spider web effects add tactile elements that catch light and create lifelike appearances on your nails. We build raised web strands using gel or acrylic materials to create texture that extends beyond the nail surface. This technique requires layering materials to achieve the dimensional effect while maintaining durability for everyday wear.
Building 3D webs starts with creating the basic web outline using regular polish, then adding dimensional elements on top. Apply small dots of clear gel or acrylic at web intersections and use a fine tool to pull the material into web strands. The raised texture creates shadows and highlights that enhance the spooky glamour of your Halloween nails. Combining these 3D webs with glossy blood drip effects or additional spider motifs intensifies the overall Halloween drama.
Blood-Themed Black and Red Halloween Nail Designs

Blood-themed designs take black and red Halloween nail art to the next level with their dramatic, horror-inspired effects. These techniques create strikingly realistic appearances that’ll make your manicure the ultimate conversation starter at any Halloween gathering.

Thorn Nail Stamping Plates: Featuring elements like flames, thorns, hearts, and roses, this design blends dark punk aesthetics with bold individuality and edgy coolness. It infuses nail art with distinctive charm, satisfying nail enthusiasts' desire to craft their own unique style

Package Includes : This nail stamping kit includes 6 sheets of designs, a scraper, and a stamper. Each stainless steel plate measures 4.72x2.36 in/12x6 cm and features punk, skull, and rose motifs for versatile placement and effortless DIY nail art
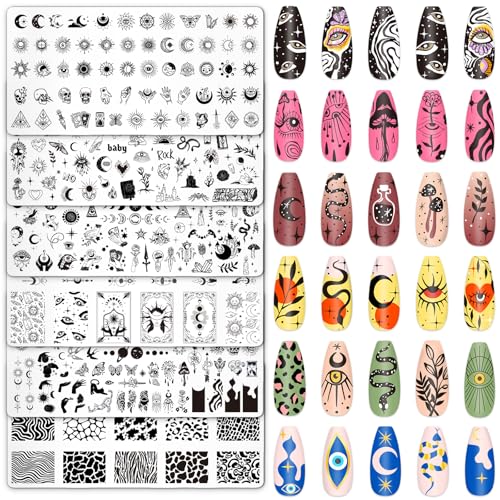
What You Get: The package includes 6 pcs nail art stamping plates in various designs, perfect for daily and party nail art making. Please note that stamp, scraper and plastic back cover are not included
Realistic Blood Splatter Effects
Realistic blood splatter effects create the most dramatic and spine-chilling Halloween nail designs you can achieve. We start with a deep black or dark base color to provide maximum contrast for the blood-red splatters. Fine brushes or specialized splatter tools help us flick red polish across the nail surface, producing irregular and chaotic patterns that mimic authentic blood drops.
Creating the Perfect Splatter
- Apply your black base coat and let it dry completely
- Load a fine brush with red polish and flick it across the nail surface
- Vary the intensity by using different shades of red polish
- Build layers gradually for a more realistic, dimensional effect
The key to mastering this technique lies in the unpredictable nature of real blood splatter patterns. We recommend practicing the flicking motion on paper first to get comfortable with the pressure and angle needed for authentic-looking results.
Ombre Blood Fade Techniques
Ombre blood fade techniques create haunting gradients that transition smoothly from deep black to vivid blood red. This method produces a subtle yet eerie effect that mimics blood slowly dripping or fading across the nail surface. We can create this gradient starting from the base of the nail and fading toward the tips, or reverse the process for different visual impacts.
Achieving Smooth Ombre Transitions
| Technique | Effect | Best For |
|---|---|---|
| Matte finish | Enhanced depth and realistic blood appearance | Subtle, sophisticated looks |
| Glossy topcoat | Wet, fresh blood appearance | Bold, dramatic statements |
| Blending with sponge | Seamless color transitions | Professional-quality results |
Expert nail artists like Robin Moses emphasize the importance of careful blending when creating these gradients. We often pair ombre effects with accent details such as filigree patterns or delicate spiderwebs to add extra Halloween flair to the overall design.
Dripping Blood French Tips
Dripping blood French tips offer a creative twist on the classic French manicure that’s perfect for Halloween celebrations. We create this effect by applying black polish as the base color, then carefully painting red polish in drip shapes along the nail tips to resemble blood trickling down the edges.
Mastering the Drip Effect
- Start with completely dry black base nails
- Use nail art brushes designed for fine detail work
- Apply red polish in irregular drip patterns along the tips
- Add subtle highlights or shadows for three-dimensional realism
This style stands out for its graphic and instantly recognizable Halloween aesthetic. The glossy, dimensional drip effect requires precision and patience, but the striking results make every effort worthwhile. We often incorporate varying drip lengths and thicknesses to create a more natural, realistic blood flow appearance that captures attention from across the room.
Witch-Inspired Black and Red Halloween Nail Designs

We’re diving deeper into the mystical area of Halloween nail art with enchanting witch-inspired designs that’ll cast a spell over your manicure. These magical motifs combine the dramatic power of black and red with intricate supernatural elements.

All-In-One Application Kit Included: You'll get 24 nails in 12 sizes. Achieve salon-quality results at home with our complete tool set—wooden stick, adhesive glue, jelly gel tabs, nail file, and cleansing wipes. No extra purchases needed
Trendy Glue on Nails Set: Upgrade your gel nails press on, so you can breeze through every season with a fresh manicure that complements and matches your wardrobe staples

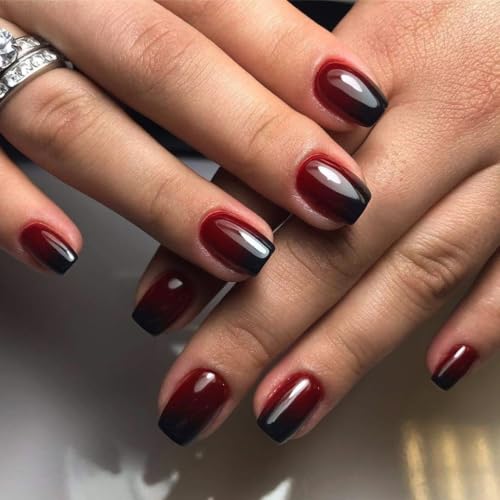
Complete Package press-on nails: You'll receive 24 pieces of red black ombre press-on nails almond medium Length,1 nail file,24 jelly glue stickers,and 1 wooden stick for easy removal.Our innovative jelly glue design makes nails reusable for multiple applications,while liquid glue provides longer-lasting wear.Perfect for both beginners and experienced nail enthusiasts
Mystical Potion Bottle Art
Mystical potion bottle designs transform your nails into miniature apothecary displays filled with glowing magical elixirs. Start by applying a glossy black base to create the perfect backdrop for your potion artwork. Paint small bottle shapes using fine nail art brushes, then fill them with translucent red polish to mimic bubbling witch’s brew.
Adding glitter effects enhances the illusion of sparkling magical liquids swirling inside each bottle. Create cork details at the bottle tops using brown or gold polish for authentic potion vessel vibes. Robin Moses demonstrates these techniques in her detailed tutorials, showing how blood drip effects can simulate potion spills cascading down your nails.
Layering different shades of red within each bottle creates depth and movement that mimics real liquid motion. Finish with a glossy top coat to make your potion bottles appear genuinely glass-like and luminous.
Witchy Hat and Broomstick Designs
Witch hat silhouettes paired with delicate broomstick details create instantly recognizable Halloween nail art that’s both charming and spooky. Paint classic pointed witch hats using matte black polish, then accent them with shimmering red bands or buckles for dimensional contrast.
Broomstick designs work beautifully as accent nails, featuring thin vertical lines for the handle and feathery brush strokes for the bristles. Use specialized nail art brushes to achieve the intricate details that make these witch-themed elements truly shine. Incorporate filigree patterns around the hat brims using metallic polish for an elegant gothic touch.
Combining matte and glossy finishes adds visual texture that makes your witch accessories appear more realistic. Position these designs strategically across your nails, perhaps featuring a witch hat on your ring finger and broomsticks on your thumbs for balanced witch-inspired storytelling.
Crystal Ball and Pentagram Patterns
Crystal ball motifs bring mystical fortune telling energy to your Halloween manicure through shimmering orb designs that appear to glow with supernatural power. Create these magical spheres using circular shapes filled with holographic or iridescent polish over your black base. Add subtle white highlights to simulate the crystal’s reflective surface and inner mystical glow.
Pentagram patterns serve as powerful witchcraft symbols that perfectly complement your occult-themed nail art. Paint these five-pointed stars using metallic red or silver polish, ensuring each point is sharp and precisely angled. Position pentagrams strategically on accent nails or incorporate them as subtle background elements.
Combining crystal balls with pentagram patterns creates a complete mystical narrative across your manicure. Use the crystal balls as focal points on your ring fingers while adding smaller pentagrams to surrounding nails for cohesive supernatural storytelling. These symbolic elements frequently appear in professional Halloween manicure sets, highlighting the enduring appeal of witchy aesthetics in nail art.
Devil and Demon Black and Red Halloween Nail Designs

Demonic black and red nail designs bring hellish intensity to your Halloween manicure with bold, fiery motifs. These sinister styles capture the essence of underworld themes while maintaining sophisticated polish techniques.

Unique Nail Sticker Set: You will get 2 sheets 5d embossed nail art stickers for acrylic nails supply, many pattern for you to choose, red black spider nail designs, and satisfy your rich imagination of nail diy

4 Boxes of Rhinestone Sets: AB Crystal Red Clear and Black glass rhinestones, 2500pcs each color, 1 of tweezers, 2 picking rhinestones pens.

【Package Included】You will get 6 pcs bow flower knot nail stickers, unique three-dimensional effect, will not fade, more realistic than ordinary stickers, you can well create a different nail effect.
Fiery Flame Gradient Effects
Flame gradients create stunning visual movement by blending deep reds into black backgrounds, mimicking hellfire’s dramatic intensity. We recommend starting with a black base coat and working upward with crimson, scarlet, and orange reds to achieve that authentic fire effect. The gradient technique should focus on the nail tips, allowing flames to appear as if they’re rising from the base.
Blending becomes easier when you use a damp makeup sponge to dab colors together while the polish remains slightly wet. We’ve found that adding a touch of yellow near the flame tips creates more realistic fire depth. A glossy top coat intensifies the fiery contrast and makes the gradient appear to dance across your nails.
Horned Devil Silhouettes
Devil silhouettes offer minimalistic yet recognizable demonic imagery that works perfectly on accent nails or full sets. We suggest painting simple horned devil heads using thin nail art brushes against blood red or pitch black backgrounds. These silhouettes should remain small and stylized to avoid overwhelming the overall design aesthetic.
Black devil shapes stand out dramatically against red bases, while red silhouettes create subtle contrast on black nails. We often add tiny glowing eyes using white or yellow dots to bring these demonic figures to life. Nail decals provide another option for achieving precise devil silhouettes if freehand painting feels challenging.
Hellish Pitchfork and Tail Designs
Pitchfork designs add symbolic devil elements that enhance the hellish theme across multiple nails. We create these three pronged weapons using thin brushes, typically painting them in metallic gold or silver against dark backgrounds for maximum impact. The pitchfork can span across an entire nail or appear as smaller accent details.
Devil tails offer curved, ever-changing elements that complement straight pitchfork lines beautifully. We paint these serpentine shapes using fluid brush strokes, often adding pointed arrow tips for authentic devil tail appearance. Chrome effects or red glitter can highlight these hellish accessories, creating blood like shine that amplifies the demonic atmosphere. Combining pitchforks with flame gradients creates comprehensive underworld storytelling across your entire manicure.
Elegant Black and Red Halloween Nail Designs for Formal Events

Transitioning from bold horror themes to sophisticated elegance, we can create stunning black and red Halloween manicures perfect for upscale gatherings and formal celebrations.

Package: You will get 6 sheets of fall/Halloween theme nail art stickers, which can add a strong fashion atmosphere. Perfect for women and girls, exquisite nail design, DIY fashion nail decoration.
Package Contents:You will get 1 sheet funny face nail art stickers for acrylic nails supply. Many lovely patterns of the gothic nail art stickers for you to choose from, colorful design, to meet your rich imagination of nail DIY. These are suitable for acrylic nails

Package Include: You will get 2 sheets of cute Halloween theme 5d acrylic engraved nail art stickers, which can add a strong fashion atmosphere. Perfect for women and girls, exquisite nail design, DIY fashion nail decoration.
Sophisticated Marble and Gold Accents
Marble nails with black and red swirls create a luxurious backdrop that elevates your Halloween manicure beyond typical spooky designs. We achieve this elegant effect by blending deep crimson and obsidian shades in organic, flowing patterns that mimic natural stone veining.
Adding thin gold foil accents transforms these marble designs into truly sophisticated nail art. Delicate gold lines traced through the swirled pattern create depth and visual interest that catches light beautifully under formal lighting. These metallic touches work exceptionally well when applied over both glossy and matte finishes.
Combining textures enhances the visual appeal of marble designs significantly. We recommend pairing matte black sections with glossy red swirls, creating dimensional contrast that appears both modern and timeless. This technique ensures your nails maintain Halloween spirit while remaining appropriate for elegant venues.
Minimalist Halloween Symbols
Incorporating small, understated Halloween motifs allows us to embrace the season without compromising sophistication. Tiny black bats silhouetted against deep red bases create subtle thematic interest that works beautifully for formal events. Single red hearts placed strategically on matte black nails offer romantic gothic appeal.
Delicate spider web patterns painted in thin red lines across black backgrounds provide Halloween atmosphere while maintaining elegance. We suggest limiting these symbols to one or two accent nails to preserve the refined aesthetic. Small blood drops crafted as perfect circles add vampiric charm without appearing overly dramatic.
These minimalist approaches work particularly well on oval or almond nail shapes, which naturally enhance the sophisticated appearance of subtle Halloween designs.
Classy Matte Black with Red Details
Matte black nail polish provides the perfect sophisticated canvas for elegant red accents that maintain Halloween appeal. This modern finish contrasts beautifully with glossy or metallic red details, creating visual depth that appears both contemporary and timeless.
Red accents can include precise French tips, thin vertical stripes, or carefully placed geometric shapes that add color without overwhelming the design. We recommend using fine brushes to create clean lines and small symbols like stylized hearts or drops that enhance the vampy aesthetic.
Press on nails featuring these classy combinations offer convenient application and long lasting wear, making them ideal for event preparation. The professional appearance of matte black with glossy red details ensures your manicure remains appropriate for sophisticated Halloween celebrations while still embracing the season’s dramatic color palette.
Easy DIY Black and Red Halloween Nail Designs for Beginners

Creating stunning black and red Halloween nail art doesn’t require professional salon skills or expensive equipment. These beginner-friendly techniques let you achieve dramatic spooky looks using basic tools you likely already have at home.

HEALTHY & LOWER ODOR - MEET ACROSS 8 colors gel nail polish are made from toxin-free ingredient, which is more safer and odorless. The nature ingredients will not damage your nails and skins. Please enjoy the pleasure of nails art more confortable!

Christmas Limited Nail Polish Set: This nail polish is a limited-edition Christmas set, consisting of red, silver, sparkles, red cat's eye, and top coat. It is rich in color, bright and beautiful, and perfectly matches the festive atmosphere. Add infinite charm to your fingertips, suitable for daily life or various gatherings

Mesmerizing Shades for Every Mood: Morovan dark nail polish set comes in 15 stunning gothic shades such as burgundy, brown, grey, dark red, green purple and black glitter nail polish, but also bright light pink, yellow, hot pink nail polish for any mood or occasion, from office dress code to festivals such as Halloween, Christmas, and Easter, as well as themed parties and celebrations, It's also a great nail polish gift set!
Simple Stripe and Dot Patterns
Stripe patterns offer the perfect starting point for Halloween nail art beginners. Paint your nails with a solid black base color and let them dry completely. Use a fine brush or even a toothpick to create red vertical stripes down each nail for a classic candy cane effect with Halloween flair. Dot patterns work equally well for minimalist spooky designs. Apply red polish as your base color and use a dotting tool or the end of a bobby pin to create scattered black dots across each nail. These simple techniques create striking contrast without requiring steady hands for intricate designs.
Alternating patterns between fingers add visual interest to your manicure. Try painting three nails black with red stripes and two nails red with black dots for a coordinated yet varied look. Color blocking creates another beginner-friendly option where you paint half the nail black and half red using tape as a guide for clean lines.
Basic Stamping Techniques
Stamping kits make professional-looking Halloween motifs accessible to beginners without freehand painting skills. Apply a red base coat to your nails and let it dry completely before stamping black bat silhouettes, spider webs, or fang patterns on top. Reverse stamping creates equally dramatic effects by using black polish as your base and stamping red designs like blood drops or vampire lips over it.
Halloween-exact stamping plates feature seasonal designs perfect for black and red color schemes. Look for plates with spider imagery, gothic patterns, or dripping blood effects that complement your color palette. Practice stamping on paper or a practice wheel before applying designs to your nails to perfect your technique and pressure.
Quick Gradient Methods
Gradient nails blending black and red create that perfect vampy Halloween effect with minimal effort. Use a makeup sponge to apply red polish on one side and black polish on the other side. Dabbing technique involves gently pressing the sponge onto your nail multiple times to blend the colors seamlessly from black at the base to red at the tips.
Ombre enhancement takes your gradient to the next level by adding glitter or creating blood drip effects over the blended base. Apply the gradient first, then use a thin brush to paint red “blood” dripping from the tips for extra Halloween drama. Sponge cleanup is essential for clean results, so use a small brush dipped in acetone to clean up excess polish around your cuticles after creating the gradient effect.
Advanced Black and Red Halloween Nail Designs for Experienced Artists

After mastering the basic techniques and elegant styles, we’re ready to explore the most challenging and visually stunning black and red Halloween nail art. These advanced designs require precision, patience, and professional-level skills to create truly show-stopping manicures.

Package Information: A total of 3 templates, 1 nail stamp and scraper, various rose flower and bouquet patterns, randomly collocation, leading the nail fashion, the world at your fingertips jump

Skull Theme: contains 3 pieces vintage skull theme nail stamping plates, featuring various skull, such as reading skull, rose skull, skull furniture, candle skull, and other classic elements, suitable for gothic fingertip creation and decoration.

Adorably Dark Nail Art for Kawaii Goth Lovers – Love creepy-cute aesthetics? Our gothic cute nail stamping plate set features delicate skulls with bows, gothic lace, and spooky hearts. Perfect for kawaii goth nails, Halloween nail art, or everyday witchy vibes. Get that pretty & mysterious look in seconds – no art skills needed.
Hand-Painted Horror Scenes
Blood drip effects showcase our artistic precision by painting red semi-circles and vertical lines against a black background to simulate dripping blood. We use fine detail brushes to control the steady hand movements required for realistic layering that makes each drop appear three-dimensional. Creating vampire motifs involves painting intricate fangs, gothic symbols, and bat silhouettes that tell a complete horror story across our fingertips.
Ghost accent nails feature tiny black eyes and mouths painted on white tips layered over a pale pink base for a playful yet spooky appearance. We achieve the most realistic effects by building up multiple thin layers rather than attempting thick applications that can appear clumsy. Ghostly figures require careful attention to proportion and spacing to maintain the ethereal quality that makes these designs so captivating.
Detailed horror imagery transforms our nails into miniature canvases where we paint cemetery scenes, haunted houses, and supernatural creatures. Each design element must be planned carefully to ensure the composition works within the limited space of a nail surface. We recommend practicing these intricate scenes on nail tips before attempting them on natural nails to perfect our technique.
Complex Layering Techniques
Gradient and ombré effects rely on sponging techniques to blend shades of red onto a black base, creating a dark blood mist effect with remarkable depth and texture. We achieve the smoothest transitions by dabbing the sponge lightly and building the color gradually rather than pressing too hard initially. Layering red polish from darker edges to brighter centers creates dimension that makes our designs appear to glow from within.
Velvety shadow effects give our nails an eerie, gothic vibe through smoky gradients that require multiple thin coats and careful blending between each layer. We create these professional finishes by allowing each layer to dry completely before applying the next, ensuring longevity throughout the Halloween season. Multiple color transitions within a single nail design showcase our mastery of advanced blending techniques.
Metallic silver embellishments elevate the luxurious aspect of our layered designs when applied strategically over gradient bases. We position these accents to catch light and create focal points that draw attention to the most intricate areas of our artwork. Complex layering also involves understanding how different polish formulations interact to prevent bubbling or uneven surfaces.
Professional-Grade Nail Art Tools
High-quality brushes ensure precision when creating the fine details that separate advanced designs from amateur attempts. We invest in brushes specifically designed for nail art, including liner brushes for thin lines and detail brushes for intricate patterns that require steady control. Fine detail brushes allow us to paint the tiny elements like spider legs, lace patterns, and facial features that make horror scenes believable.
E-files and preparation tools create the smooth nail surface essential for professional polish application and complex designs. We use these tools to shape our nails perfectly and remove any imperfections that could affect the final appearance of our artwork. Proper nail preparation prevents chipping and extends the wear time of our detailed designs significantly.
Professional top coats seal our intricate artwork and provide the durability needed for designs that take hours to complete. We apply base coats first to protect our natural nails from staining and create the ideal surface for polish adhesion. Meticulous cleanup with angled brushes dipped in acetone ensures crisp edges that maintain the professional quality of our advanced Halloween nail art throughout the spooky season.
Conclusion
We’ve explored the captivating industry of black and red Halloween nail designs that perfectly capture the essence of spooky season while maintaining year-round appeal. From dramatic blood-themed effects to sophisticated gothic elegance these color combinations offer endless creative possibilities for every skill level.
Whether you’re drawn to mystical witch motifs devilish flame gradients or refined minimalist symbols there’s a black and red design that’ll make your Halloween manicure unforgettable. The versatility of these colors means you can easily transition from beginner-friendly dots and stripes to advanced hand-painted horror scenes.
Remember that the key to stunning black and red nail art lies in mastering layering techniques and choosing the right finish for your desired effect. With the right tools and a bit of practice you’ll be creating show-stopping Halloween nails that’ll have everyone asking where you got them done.

Stick on nail tips are made of quality ABS material which can last for about a week,but the durability of jelly gel is limited.We recommended to use your own glue.

Spooktacular Designs: Our Halloween press on nails feature an eye-catching red black gradient design, perfectly tailored for the festive season, ensuring your manicure stands out at any Halloween event.

French Tip Press On Nails Set: Our Handmade gel press on nails almond are produced using a manual process. Each acrylic nails press ons is applied with a base coat, color gel, decorative patterns, and a top coat formulated with gel polish for a refined finish. These ombre nails press on are designed to help you achieve a professional appearance quickly
Frequently Asked Questions
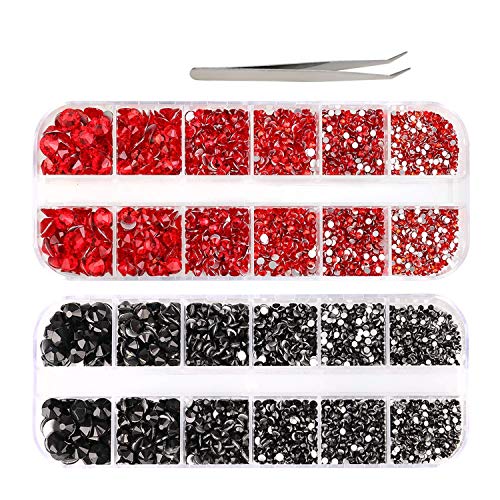
3000 Crystal rhinestones with tools, black and red color in 6 sizes package in 2 boxes with 12 grids; The rhinestones are not hotfix and need glue to stick them. (glue is not included)

♛WHAT YOU WILL RECEIVE: A box of 14000pcs flatback pearls and rhinestones to meet your different needs. Besides, this set of half pearls and gems also with a tweezer and a picker pencil, which help you spare no effort to pick up the beads.

❤️Cute 3D Nail Art Accessories Set❤️ 2 pcs translucent boxes containing 12 grids each, 1400 pcs acrylic nail charms. This nail kit contains more than 30 styles, sufficient quantity and styles can meet your different creative DIY demands.
What makes black and red nail designs perfect for Halloween?
Black and red nail designs create the perfect spooky-chic aesthetic for Halloween while being versatile enough to wear year-round. These colors naturally evoke mystery, gothic romance, and Halloween drama. The combination allows for stunning effects like blood drips, vampire themes, spider designs, and witch-inspired art that capture the essence of the spooky season.
Can beginners create black and red Halloween nail art?
Absolutely! Beginners can start with simple stripe and dot patterns using a solid black base enhanced with red accents. Basic stamping techniques with Halloween motifs and quick gradient methods make professional-looking designs accessible. The key is starting with easy designs and gradually building skills before attempting more complex hand-painted scenes.
What are some popular black and red Halloween nail design themes?
Popular themes include vampire-inspired blood drips, gothic roses with thorns, spider and web designs, witch motifs with potion bottles, devil and demon flames, and elegant marble effects. Each theme offers various complexity levels, from simple accent nails to intricate hand-painted horror scenes, allowing customization based on skill level.
How do you create realistic blood drip effects on nails?
Start with a black base, then layer different shades of red polish for depth and realism. Use fine brushes to create drip shapes, beginning thick at the cuticle and tapering down. Allow each layer to dry completely before adding the next. Adding darker red or burgundy creates more authentic-looking blood effects.
Are black and red nail designs appropriate for formal events?
Yes! Elegant variations include sophisticated marble effects with gold accents, minimalist Halloween symbols like tiny bats, and classy matte black nails with subtle red details. These refined approaches maintain professionalism while embracing Halloween spirit, making them perfect for formal Halloween events or office-appropriate seasonal style.
What tools are needed for advanced black and red nail art?
Advanced designs require high-quality detail brushes, stamping plates for intricate patterns, dotting tools, and professional-grade base and top coats. For 3D effects, consider nail gems, pearls, or crystals. E-files help achieve smooth finishes, while fine brushes are essential for precise details like spider legs or delicate lace patterns.
How long do black and red Halloween nail designs typically last?
With proper application including base coat, quality polishes, and top coat, these designs typically last 7-10 days. Matte finishes may show wear sooner, while glossy designs with proper sealing tend to last longer. Using cuticle oil and wearing gloves during household tasks helps extend the manicure’s lifespan.
Can you mix different black and red design elements on one manicure?
Definitely! Mixing elements creates cohesive storytelling across your nails. For example, combine blood drips on accent nails with spider webs on others, or pair witch hats with potion bottles. The key is maintaining color consistency and ensuring elements complement rather than compete with each other for visual balance.