We’ve all been there – standing in front of our nail polish collection feeling completely overwhelmed by choices. But what if we told you that the most stunning manicures often come from the simplest color combinations? Black and white nail designs aren’t just timelessly elegant; they’re also incredibly versatile and surprisingly easy to create at home.
The beauty of monochrome nails lies in their effortless sophistication. Whether you’re heading to a business meeting or a weekend brunch these classic shades complement every outfit and occasion. From minimalist stripes to playful polka dots we’ll show you how to achieve salon-quality results without very costly or spending hours perfecting intricate designs.
Ready to discover why black and white nails are taking over social media feeds everywhere? We’ve curated the most stunning yet simple nail art ideas that’ll have your friends asking where you got your manicure done. Let’s jump into these foolproof designs that prove sometimes less really is more.
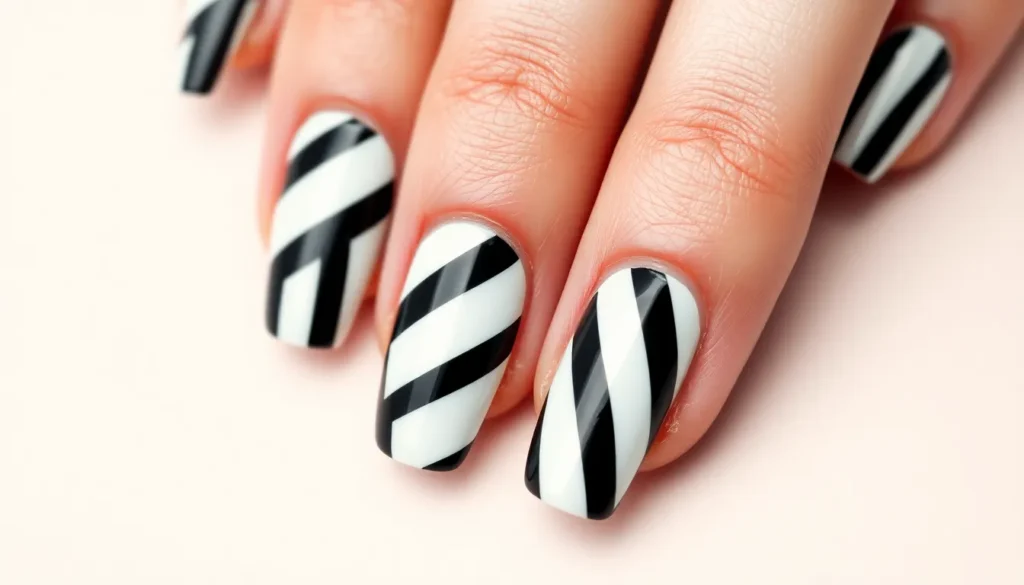
Classic Black and White Stripes for Effortless Elegance
Striped nail designs represent the perfect starting point for anyone new to black and white nail art. These patterns deliver maximum visual impact with minimal effort and technical skill required.

【EFFORTLESS OMBRE & STAMPING】 Tired of traditional stamping polish drying too fast? Our stamping gel stays wet until cured under a UV/LED lamp. This gives you infinite time to perfect your gradient ombre or intricate patterns without the rush, ensuring professional results for beginners.
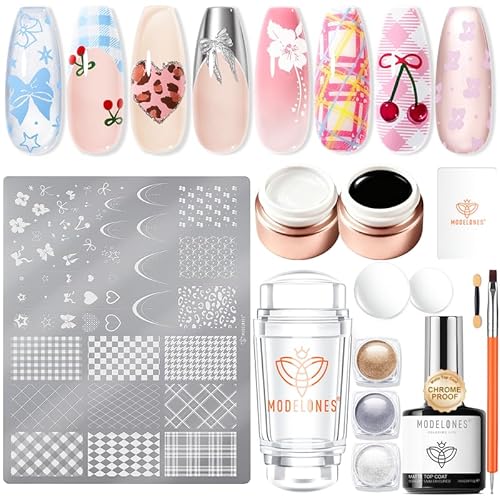
All Spring/Summer Checks in One Plate: Catch the hottest gingham/plaid nail trend instantly with no painting skills needed. Create clean, sharp patterns in seconds—no shaky hand-drawing, no smudges, just salon-worthy preppy, French tip, or spring-ready looks for a whole season of manicure
Horizontal Stripe Patterns
Paint horizontal stripes across your nails for a classic look that elongates fingers. We recommend starting with a white base coat and allowing it to dry completely before adding black stripes. Nail striping tape creates perfectly straight lines without bleeding or smudging.
Space your stripes evenly for the most polished appearance. Three to four horizontal lines work best on most nail lengths. Wider stripes create a bold statement while thinner lines offer subtle sophistication.
Remove the tape while your polish is still slightly wet to prevent peeling. This technique ensures clean edges and professional results every time. French manicure brushes can also create horizontal stripes if you prefer freehand application.
Vertical Stripe Designs
Create vertical stripes to make your nails appear longer and more slender. This orientation works particularly well on shorter nail beds. We suggest alternating between thick and thin lines for added visual interest.
Apply vertical stripes using the same tape method as horizontal designs. Position the tape from cuticle to tip ensuring straight alignment. Two to three vertical stripes per nail provide the ideal balance without overwhelming smaller nail surfaces.
Experiment with different stripe widths on each nail for a modern twist. Vary the thickness across your fingers while maintaining the same color scheme. This approach creates movement and prevents the design from appearing too uniform.
Diagonal Stripe Variations
Angle your stripes diagonally for a ever-changing and contemporary look. Diagonal lines add energy to your manicure while remaining simple to execute. We find that 45 degree angles work best for most nail shapes.
Create chevron patterns by combining diagonal stripes in opposite directions. Start with diagonal lines going one way then add stripes in the opposite direction to form V shapes. This variation adds geometric interest without requiring advanced nail art skills.
Mix diagonal and straight stripes on different nails for an eclectic set. Use diagonal stripes on accent nails while keeping other nails simple with horizontal or vertical lines. This combination prevents your manicure from looking too busy while adding personality to your black and white design.
Minimalist Polka Dot Patterns That Make a Statement
 1")
Polka dots bring a playful sophistication to black and white nail designs without overwhelming the minimalist aesthetic. We’ll explore three versatile approaches that transform simple dots into striking statement nails.

Striping Nail Tape: 20pcs nail tapes, width: 0.8mm. We have selected 4 different colors foil tape for nails, include 5pcs gold ,5pcs silver,5pcs black, pcs white, striping nails tape. Each holographic nail tape roll has a length of 787 inches when pulled apart.

【DIY Nails Art Design】The Bendy and flexible characteristic of this this nail art stickers makes it fit for both french tip and other abstract nail art. This nail tape for nail art fit not only your fingernails, but also toes!
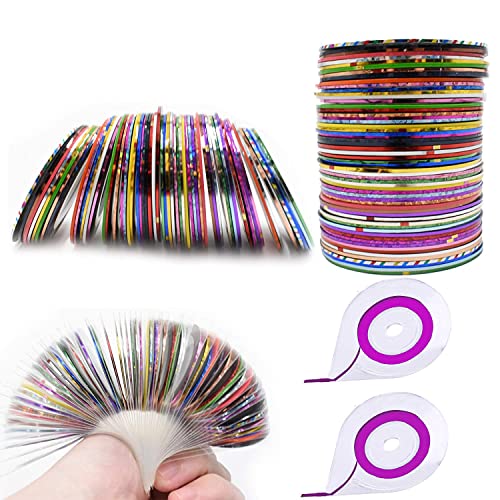
What you receive: you will receive 60 pieces nail striping tape line in 30 assorted colors, and 2 pieces nail striping tape dispensers, striping tape line includes silver, golden, green, blue, red, purple, rose, white color and so on, enough quantity and assorted colors for you to decorate your nail.
Small Dot Accent Nails
Small dots create the perfect accent for minimalist nail art enthusiasts. Using a dotting tool, we can place tiny white dots on one or two black nails for subtle contrast. This technique works exceptionally well on ring fingers or thumbs as featured accent nails.
Position dots in various patterns like straight lines, curves, or random clusters for different visual effects. We recommend starting with three to five dots per accent nail to maintain the minimalist appeal. The small size ensures versatility, making these designs appropriate for both professional settings and casual occasions.
Practice on a nail wheel first to perfect your dot placement and spacing. Even pressure on the dotting tool creates uniform circles that enhance the overall polished appearance.
Large Dot Feature Designs
Large dots serve as bold focal points in black and white nail art. We can create these statement designs by painting one or two nails entirely in the base color, then adding a single oversized dot in the contrasting shade. The dot should cover roughly one third of the nail surface for optimal visual impact.
Center placement works best for large dots on shorter nails, while off center positioning adds modern flair to longer nail beds. We suggest using the eraser end of a pencil or a large dotting tool to achieve consistent size across multiple nails.
This approach transforms simple manicures into conversation starters while maintaining the sophisticated black and white color scheme. The key lies in balancing the large dot with clean, unadorned nails on remaining fingers.
Mixed Size Dot Combinations
Mixed size dots create ever-changing visual interest through strategic size variation. We can combine small, medium, and large dots on the same nail or distribute different sizes across multiple nails for a cohesive yet varied look.
Start with the largest dot as your anchor point, then add progressively smaller dots around it. This creates natural flow and prevents the design from appearing cluttered. We recommend limiting yourself to three different dot sizes maximum to maintain visual harmony.
Alternating dot sizes across nails creates rhythm in your overall manicure design. Paint dots in clusters of three or five for pleasing asymmetrical balance, ensuring each nail contributes to the unified black and white theme while maintaining its individual character.
Geometric Shapes for Modern Nail Art Lovers
 2")
We’re diving into the industry of geometric nail art that perfectly balances sophistication with contemporary style. These angular designs transform simple black and white polish into eye-catching masterpieces that work beautifully for any occasion.
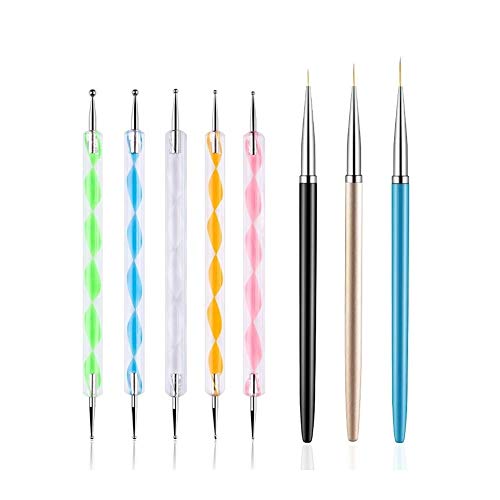
【8PCS Professional Nail Art Accessories】 Includes 5pcs 2-ways nail art tool dotting pens and 3pcs nail art liner painting brushes, helps you to make your own nail art styles.

【10 Sizes Dual-Ended Design】 Includes 5 double-ended dotting pens (10 different sizes tips), suitable for fine details, dotting, embossing, and intricate nail art designs.

Unleash Your Creativity: Our 5-piece dotting tool set is perfect for creating intricate nail art designs and DIY projects.
Triangle and Square Patterns
Triangular designs create striking visual impact using pointed shapes arranged across your nails. Start by painting a white base coat, then use black polish to form triangles near the cuticle or nail tip. Square patterns offer a bold alternative with their clean, structured appearance that frames each nail beautifully.
Position triangles in different orientations to add variety – some pointing upward while others face downward creates ever-changing contrast. Square shapes work exceptionally well when arranged in a checkerboard pattern or placed as accent blocks on the nail surface. Both designs allow endless customization through size variations and placement adjustments.
Chevron and Zigzag Designs
Chevron patterns feature inverted V shapes that create sophisticated arrow-like designs across your nails. Paint these pointed formations using nail striping tape for crisp edges, alternating between black and white sections to maximize visual impact. The inverted V structure naturally draws attention and elongates the appearance of your fingers.
Zigzag designs offer continuous alternating lines that flow seamlessly from one side of the nail to the other. Create these ever-changing patterns by drawing connected diagonal lines that change direction at regular intervals. This technique produces movement and energy that makes your nails appear longer and more dramatic.
Abstract Geometric Combinations
Mixed shape designs combine triangles, squares, and other geometric forms in creative arrangements that feel modern and artistic. Layer different shapes over each other or place them side by side to create complex patterns that still maintain the simplicity of black and white polish. These versatile combinations let you experiment with balance and proportion.
Abstract arrangements work best when you vary the sizes and positions of your geometric elements randomly. Place a large triangle on one nail while adding small squares to another, creating visual interest without overwhelming the overall design. This approach ensures each nail contributes to a cohesive look while maintaining individual character.
French Manicure Variations with Black and White Twists
 3")
French manicures get a sophisticated upgrade when we swap traditional colors for striking black and white combinations. These monochrome variations maintain the elegant simplicity of classic French nails while adding contemporary edge to your look.

【2025 CLASSIC Nail Art Gel Set】AIBRIT gel liner nail polish set includes 4pcs classic colors: Gold, Shiny Silver, Classical Black, and White.Perfect for any gel nail art

Classic Colors: Black and white are timeless colors in nail art, always trendy and never out of style. This black and white gel polish set is perfect for French manicures and an essential kit for nail art enthusiasts.

Classic French Style: Modelones gel nail polish set includes 2 colors black gel polish and jelly nude pink 15ml each designed for French manicure. Create natural simple and elegant French tips or nude nail art at home or salon
Black Tip French Manicure
Black tip French manicures replace the traditional white tips with sleek, crisp black polish for a modern twist on the classic style. We love how this variation maintains the elegant structure of French nails while adding dramatic contrast that works beautifully on short almond shaped nails or classic square cuts.
Creating this look requires precise application along the nail tip, similar to traditional French techniques but with bold black polish instead of white. The key lies in achieving clean, even lines that follow your natural nail shape. Many nail artists recommend using nail guides or tape to ensure perfectly straight edges.
Enhancement options include adding subtle black and white floral designs or clean geometric lines for extra visual interest. These accents complement the black tips without overwhelming the minimalist aesthetic. The result delivers an edgy yet sophisticated look that transitions seamlessly from day to night.
White Base with Black Accents
White base manicures with black accents maximize contrast while keeping the overall design clean and striking. We apply a white or milky base coat across all nails, then add black details through line art, abstract patterns, or simple accent designs.
Delicate black line work over white bases creates an artistic touch without complicated techniques. These designs might feature thin parallel lines, curved swooshes, or minimal geometric shapes that enhance rather than dominate the white foundation. The contrast makes even simple black details appear bold and intentional.
Abstract patterns work particularly well with this approach, allowing for creative expression while maintaining the minimalist black and white theme. We can create these patterns using dotting tools, thin brushes, or even toothpicks for spontaneous artistic effects. The white background ensures that black accents remain the focal point of each nail.
Reverse French Manicure Styles
Reverse French manicures invert the classic design by painting the area near the cuticle instead of the nail tips. We apply black or white polish in a curved or straight line along the base of each nail, creating an unexpected twist on the traditional French look.
Geometric reverse French designs incorporate diagonal lines and dual tone effects for contemporary Instagram worthy results. These variations might feature angled cuts, triangular shapes, or asymmetrical patterns that create visual interest while maintaining the simplicity of two color schemes. The geometric approach adds modern sophistication without requiring complex nail art skills.
Color placement options include alternating black and white bases across different nails or creating gradient effects from one hand to the other. We can experiment with curved versus straight lines, thick versus thin application, and various geometric interpretations to find the perfect balance for individual style preferences.
Half-Moon Designs for Sophisticated Simplicity
 4")
Moving beyond geometric patterns, half-moon designs offer a refined approach that combines classic elegance with modern minimalism. These crescent-shaped patterns create visual balance while maintaining the sophisticated simplicity that makes black and white nail art so appealing.

【You will get】 There are 6 sheets french tips guides nail stickers,consisting of v-shape,wave,deep french tips,half moon and soon on.

PACKAGE CONTENTS: Set includes 240 pieces of white nail art guide stickers, perfect for creating professional-looking manicure designs at home

THREE KINDS OF ARC MOON SHAPES: Come with 36 sheets for 3 moon shapes design, 12 sheets for each design. More than 400 stickers per design, 1368 stickers in total. Suitable for different nail sizes and radians.
Classic Half-Moon Base
Classic half-moon base designs showcase a crescent at the nail’s base, creating an elegant contrast that highlights the natural lunula. We start by applying a base coat and allowing it to fully dry for optimal polish adhesion. Next, we paint the entire nail with white polish in two even coats, ensuring complete coverage.
After the white polish dries completely, we position a reinforcement sticker or hole punch circle at the base, centering it over the lunula area. Pressing the sticker firmly prevents polish bleeding and creates clean lines. We then paint the exposed nail bed area with black polish, creating the distinctive crescent shape. Once dry, we carefully remove the sticker and apply a top coat for a crisp, professional finish.
This timeless design works beautifully for both casual and formal occasions, offering sophisticated style without overwhelming complexity.
Inverted Half-Moon Tips
Inverted Half-Moon Tips reverse the classic style by placing the crescent at the nail’s free edge, creating a modern twist on traditional designs. We begin with the same preparation process, applying base coat and white polish to the entire nail.
The key difference lies in sticker placement – we position the guide near the nail tip instead of the base. After applying white polish and allowing it to dry, we place our sticker or guide and paint the exposed tip area with black polish. This creates a striking contrast that draws attention to the nail tips.
We remove the sticker once the black polish is dry and seal everything with a top coat. This contemporary interpretation offers a fresh take on half-moon designs while maintaining their sophisticated appeal.
Double Half-Moon Patterns
Double Half-Moon Patterns feature two crescents with a contrasting middle band, creating the most dramatic variation of this design style. We apply base coat and paint the nail white as our foundation color.
Using two stickers or guides, we position one at the base and another at the tip, creating defined crescent areas. We then paint both exposed areas with black polish, leaving the white middle section visible. For those comfortable with detailed work, we can use a thin brush to hand-draw the crescents for a completely custom look.
This advanced technique requires patience but delivers stunning results that combine multiple design elements. We seal the finished design with top coat to protect the intricate pattern and enhance its visual impact.
These half-moon variations use simple tools like reinforcement stickers, brushes, and standard nail polish to create elegant statement nails with minimal effort while maximizing visual appeal.
Checkerboard Patterns for Retro-Inspired Nails
 5")
Checkerboard patterns bring bold retro vibes to black and white nail art while remaining surprisingly simple to create. We’ll explore three distinctive approaches that transform your nails into eye-catching statement pieces.

Dreamy Demure Lace Nail Art: Catch the hottest delicately engraved lace nail trend instantly with no painting skills needed. Create clean, sharp patterns in seconds—no shaky hand-drawing, no smudges, just salon-worthy preppy, French tip, or spring-ready looks for a whole season of manicure

Package Information: A total of 3 templates, 1 nail stamp and scraper, alphabet, numbers, plants, flowers, stain patterns, randomly collocation, leading the nail fashion, the world at your fingertips jump

💅【What You Get】3 colors nail stamp gel (black, white, shining golden) are very suitable for daily stamp art use and are the first choice for fashion nail art lovers.use.
Traditional Checkerboard Grid
Traditional checkerboard grids create the classic look we associate with retro style through evenly sized squares arranged in a standard pattern. We start with a white base coat on each nail and allow it to dry completely before proceeding to the grid formation.
Drawing intersecting lines with a nail striper or thin brush creates the foundation grid that resembles a tic-tac-toe board. We carefully map out the squares to ensure they’re uniform in size and properly aligned across the nail surface.
Filling alternate squares with black polish requires patience and precision to maintain clean edges. We work systematically across each nail, completing all black squares before moving to the next finger.
Sealing the design with a top coat protects the pattern and adds the glossy finish that makes checkerboard nails truly pop. We apply the top coat in thin, even strokes to avoid smudging the carefully crafted squares.
Oversized Checker Squares
Oversized checker squares offer a modern interpretation that’s both striking and beginner-friendly. We create this look by painting larger blocks instead of traditional small checks, making the application process significantly easier.
Dividing the nail into just two sections allows us to paint half white and half black for maximum impact. We can also create one or two large checkerboard squares per nail, depending on nail length and desired aesthetic.
Shorter nails particularly benefit from this simplified approach since oversized squares don’t require intricate detailing. We find that this technique works exceptionally well for those who want the checkerboard effect without the complexity of multiple small squares.
The bold contrast of large squares creates immediate visual impact while requiring minimal artistic skill. We recommend this variation for anyone new to nail art or those seeking a quick yet impressive design.
Diagonal Checkerboard Layout
Diagonal checkerboard layouts add ever-changing movement through diamond-shaped grids that break away from traditional straight lines. We draw diagonal lines instead of vertical and horizontal ones to create this captivating geometric pattern.
Forming diamonds rather than squares gives the design a sense of motion and visual interest that standard checkerboards lack. We alternate black and white paint within each diamond shape, maintaining the classic checkerboard concept while adding contemporary flair.
The intersecting diagonal lines create a more complex visual texture that catches light differently than traditional grids. We find this technique particularly effective for longer nails where the diamond pattern has more space to develop.
Varying the angle of diagonal lines can create different effects, from subtle slants to dramatic geometric statements. We experiment with different orientations to find the most flattering angle for each nail shape and length.
Color Block Techniques for Bold Contrast
 6")
Moving beyond intricate patterns, we’ll explore color blocking techniques that create stunning visual impact through strategic placement of black and white sections. These bold approaches maximize the dramatic contrast between monochrome shades while maintaining simplicity in execution.

SUFFICIENT QUANTITY: The product contains 20 pieces of nail decals for nail art in 4 different colors, which is sufficient in quantity and variety of colors for you to choose to match your nail decorations
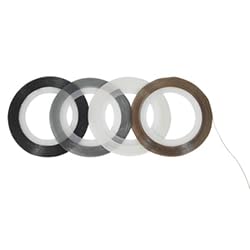
Four Colors Included: Enjoy nail art versatility with four vibrant colors - Black, Silver, White, and Gold

Package List: The package contains 6 pieces of nail tape, which is enough to meet your daily manicure DIY needs and professional nail salons. You can also share it with family and friends
Single Accent Nail Blocking
Single accent nail blocking focuses attention on one or two strategic nails, typically the ring finger or thumb, creating a subtle yet impactful design. We paint the accent nail solid black while keeping others white, or incorporate geometric shapes and stripes for extra visual interest. This technique provides a perfect balance between understated elegance and bold contrast without overwhelming the entire manicure.
Choose your ring finger as the primary accent nail since it naturally draws attention when gesturing or holding objects. Paint the remaining nails in complementary solid white, allowing the black accent to serve as a focal point. Add thin white stripes or geometric shapes to the black accent nail for enhanced detail while maintaining the minimalist aesthetic.
Alternating Color Block Nails
Alternating color block nails create a striking checkerboard effect by painting each nail in either solid black or white across both hands. This technique produces a cohesive yet ever-changing manicure that remains visually impactful while being surprisingly easy to execute at home. We can adapt this approach using various nail shapes, from standard round to square tips, or incorporate half moon and diagonal block variations.
Start with your dominant hand, painting the thumb and middle finger black while keeping the index, ring, and pinky fingers white. Mirror this pattern on your opposite hand, or create variation by alternating the color placement for a more ever-changing look. Apply base coat first, then use quality opaque polish to ensure even coverage without streaking.
Gradient Color Block Effects
Gradient color blocking offers a modern twist by creating soft transitions between black and white rather than sharp contrasting lines. We achieve this sophisticated effect through sponge blending techniques or ombre painting methods that create seamless color flow. This approach pairs beautifully with minimalist aesthetics while adding subtle depth and movement to the overall design.
Use a makeup sponge to blend black and white polish at the center point of each nail, working quickly before the polish sets. Apply the darkest shade first, then layer the lighter color while gently dabbing to create smooth gradation. Split the gradient effect across both hands for creative variation, with one hand transitioning from black to clear and the other from white to clear.
Simple Line Art and Doodle Designs
 7")
We’re embracing the minimalist beauty of line art and doodle designs that bring artistic flair to black and white nails. These clean, modern patterns offer endless creativity while maintaining the sophisticated simplicity that makes monochrome nail art so appealing.

You Will Get: The package contains 1pcs 6-in-1 nail dotting tool in black, suitable for beginners learning nail art or professionals needing reliable tools for salon work

Package contains:Include 14pcs black nail art brushes set,5pcs nail dotting tool,3pcs Nail Art Liner pen,1pcs pen holder,1pcs color palette,3pcs double ended Nail Art Liner brush,5pcs Nail Art painting brush for gel nail polish

Common Nail Art Tools for Nail Design: What you will get: 15 x nail brush, 5 x nail dotting tool, 2 set of magnetic nail stand (including 10 PCS chess-shaped nail stand for press ons, 2 PCS rectangular clear base), 1 x double-sided tape for nail holder, 1 x tweezers. Practical nail tools for nail art help to create nail design work!
Thin Line Patterns
Thin Line Patterns create striking visual impact through ultra-fine details that showcase precision and elegance. We recommend starting with parallel lines that run horizontally across the nail, spacing them evenly at 2-3mm intervals for optimal contrast. Vertical thin lines work beautifully on longer nails, creating an elongating effect that makes fingers appear more slender.
Wave patterns add gentle movement to your design while maintaining the minimalist aesthetic we love. Draw flowing curves in black on white base coats, varying the amplitude slightly for natural-looking waves. Crosshatching techniques involve creating intersecting thin lines at 45-degree angles, forming diamond-like patterns that catch light beautifully.
Zigzag and dot combinations bring playful sophistication to thin line designs. Alternate between sharp zigzag patterns and tiny dots along the nail bed, using a fine brush or dotting tool for precise application. These patterns work exceptionally well on accent nails paired with solid colors on remaining fingers.
Heart and Star Doodles
Heart doodles transform simple black and white nails into charming expressions of personality and style. We suggest painting small hearts in black on white base coats, positioning them near the cuticle area or tip for maximum visual appeal. Outline hearts create delicate designs, while filled hearts offer bolder statements that work perfectly on accent nails.
Star patterns add celestial magic to your minimalist nail art with various sizing options. Draw five-pointed stars using thin brushes, alternating between solid black stars on white backgrounds and white stars on black bases. Crescent moon shapes pair beautifully with stars, creating dreamy night sky themes that remain elegantly simple.
Playful placement techniques maximize the impact of heart and star doodles across your manicure. Scatter small hearts and stars randomly on two accent nails while keeping other nails solid colored. Group multiple small doodles together on ring fingers for focal points, or create trailing patterns that flow from cuticle to tip.
Abstract Line Drawings
Abstract Line Drawings offer complete creative freedom while maintaining the clean aesthetic of black and white nail art. We create these designs using freeform, unconnected lines that flow naturally across the nail surface without predetermined patterns. Smooth, curving lines work beautifully alongside angular geometric shapes for ever-changing contrast.
Expressive shapes emerge from spontaneous line work that captures artistic energy in minimalist form. Draw overlapping circles, irregular triangles, and flowing ribbons that connect and separate randomly. These unstructured patterns create unique designs that are impossible to replicate exactly, making each manicure one of a kind.
Fresh approaches to abstract line art include layering techniques that build complexity gradually. Start with basic curved lines in black, then add intersecting straight lines in strategic places. Combine thick and thin line weights within the same design, using brush pressure to create natural variation that adds visual depth and artistic sophistication.
Negative Space Nail Art for Contemporary Style
 8")
Negative space techniques elevate black and white nail art by strategically leaving portions of the natural nail unpainted. This sophisticated approach creates striking contrasts between opaque color and bare nail, delivering a minimalist yet impactful contemporary style.
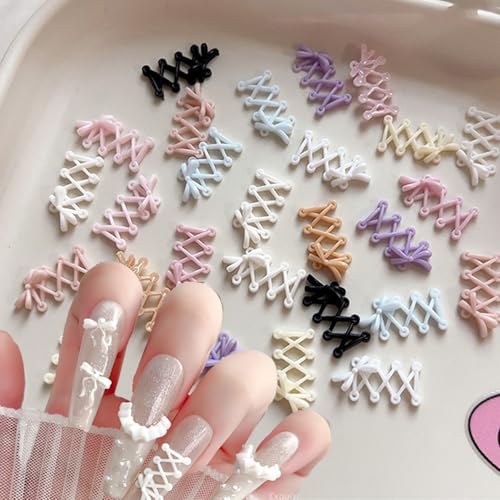
Package: You will get 150Pcs 3D bow nail art chars, exquisite bow shape nail design decoration can provide you with a variety of choices, allowing you to easily DIY your designer nail decoration at home.

【Must-have Nail Art Gel Set】Gel liner nail art set includes 4pcs classic colors: Gold, Shiny Silver, Classical Black, and White.The perfect colors for creating endless gel nail art designs

【Package Contents】Born Pretty French Tip Nail Stamps Set contains 1PCS Long French Tip Nail Stamp, 1PCS White Gel Nail Polish and 1PCS Light Pink Jelly Gel Nail Polish. Jelly Gel Nail Polish is a semi-transparent gel nail polish, with white nail polish, you can easily create stylish and fun French manicure artwork with the nail stamps. Cure with U V LED nail lamp.
Cut-Out Shape Designs
Geometric patterns offer the most versatile foundation for negative space nail art. Triangles, squares, and circles cut from your black or white base reveal the natural nail underneath, creating clean architectural lines that emphasize modern sophistication. We recommend starting with simple triangular shapes positioned at the nail’s center or corner, as they’re forgiving for beginners yet deliver professional results.
Abstract forms provide creative freedom while maintaining the minimalist aesthetic. Organic shapes like teardrops, crescents, or freehand curves add artistic flair without overwhelming the design. Paint your chosen base color first, then use nail art brushes or dotting tools to carefully remove sections while the polish is still tacky, creating perfectly defined negative space cutouts.
Circular cutouts create particularly striking effects when positioned strategically. Small circles near the cuticle or nail tip frame the natural nail beautifully, while larger circles positioned centrally make bold statement pieces. Multiple small circles scattered across the nail surface mimic modern art installations for those seeking more complex designs.
Partial Coverage Patterns
Half-moon manicures showcase the elegant simplicity of negative space techniques. Paint the lower portion of your nail black or white while leaving the upper section natural, creating a sophisticated crescent shape that elongates the finger. This technique works exceptionally well with black polish, as the contrast against the natural nail creates dramatic visual impact.
Diagonal coverage patterns add contemporary movement to your manicure. Apply color at sharp angles across the nail, leaving triangular sections of bare nail visible. We suggest using nail tape to achieve crisp lines, removing it while the polish is slightly wet to prevent chipping. Curved coverage offers a softer alternative, with gentle arcs that create flowing, organic shapes.
Vertical coverage creates striking asymmetrical designs. Paint half the nail vertically, leaving the opposite side natural for a modern split effect. This technique particularly suits longer nails, as it creates visual length while maintaining the sophisticated contrast that makes negative space art so appealing.
Window-Effect Nail Art
Window pane designs mimic architectural elements through carefully planned grid patterns. Create a framework of thin black or white lines that divide the nail into rectangular sections, leaving alternating squares unpainted. This technique requires steady hands but produces stunning results that resemble miniature stained glass windows on your nails.
Framed shapes take the window concept further by creating “picture frames” around small negative space areas. Paint your base color, then use a thin brush to outline geometric shapes, leaving the interior sections natural. These framed elements can be positioned anywhere on the nail, creating focal points that draw the eye while maintaining overall simplicity.
Multiple window effects across different nails create cohesive yet varied designs. Alternate between horizontal and vertical frames, or combine different frame sizes for visual interest. The key lies in maintaining consistent line thickness and spacing, ensuring your window effects appear intentional rather than random.
Marble Effect Techniques for Artistic Flair
 9")
Marble effects bring sophisticated texture to black and white nail designs. These techniques create natural stone patterns that elevate minimalist manicures with artistic elegance.
PACKAGE CONTENTS: Set of 240 white nail stickers designed for creating professional-looking French manicure tips and nail art designs
PACKAGE INCLUDES: 240 pieces of white nail art guide stickers, perfect for creating consistent and precise French tip manicures

🤩Versatile Nail Art Tool: This set includes 240 pieces of white nail sticker strips, perfect for creating intricate nail designs and patterns.
Water Marble Patterns
Water marble patterns create intricate swirling designs that mimic natural stone formations. We drop black and white polish onto water’s surface then use a stick or tool to create flowing patterns. Dragging lines across the polish creates petal-like shapes that transfer beautifully when we dip our nails into the water.
Multiple fingers can receive matching designs efficiently by positioning them together during the dipping process. Black dots added to white areas enhance the marble effect with detailed contrast. This traditional method produces the most authentic marble appearance but requires practice to master the swirling technique.
Room temperature water works best for maintaining polish consistency during the marbling process. We recommend practicing the swirling motion on paper first to understand how colors blend and flow together.
Dry Brush Marble Techniques
Dry brush marble techniques offer mess-free alternatives to water marbling methods. We use a nearly dry brush with black polish to stroke over a white base coat creating subtle marble streaks. This method produces soft artistic effects without the complexity of water-based techniques.
Streaky patterns emerge naturally when we drag the brush across the nail surface in organic motions. Quick application makes this technique ideal for beginners seeking simple black and white designs. The brush should contain minimal polish to avoid heavy application that obscures the marble effect.
Varying brush pressure creates different streak intensities throughout the design. We can layer multiple brush strokes to build depth and texture in the marble pattern.
Sponge Marble Effects
Sponge marble effects create textured stone-like appearances using basic makeup tools. We lightly dab a makeup sponge with black polish over a white base to achieve organic color blending. This beginner-friendly technique requires minimal equipment while producing professional-looking results.
Textured surfaces from sponge application mimic natural stone patterns effectively. The sponge helps colors blend organically without harsh lines or obvious application marks. Different sponge densities create varying texture levels in the final marble design.
Patting motions work better than dragging to maintain the marble’s natural appearance. We can build color intensity gradually by repeating the dabbing process until achieving desired contrast levels.
Conclusion
Black and white nail designs offer endless possibilities for creating stunning manicures that never go out of style. We’ve explored everything from classic stripes and polka dots to sophisticated marble effects and negative space art – proving that monochrome doesn’t mean boring.
The beauty of these designs lies in their simplicity and accessibility. Whether you’re a complete beginner or looking to refine your skills we’ve provided techniques that work for every level. From basic geometric patterns to advanced water marble effects you now have the tools to create salon-quality results at home.
These timeless color combinations work for any occasion – from professional settings to special events. We encourage you to experiment with different techniques and find your personal style within this versatile palette. Your perfect black and white manicure is just a few brush strokes away.
Frequently Asked Questions
What makes black and white nail designs so popular?
Black and white nail designs are timeless and versatile, offering sophisticated elegance that works for any occasion. They’re currently trending on social media and provide a minimalist aesthetic that’s both chic and easy to achieve at home without expensive products or complicated techniques.
Can beginners create professional-looking black and white nail art?
Yes! The article emphasizes that these designs are beginner-friendly. Simple techniques like striped patterns, polka dots, and basic geometric shapes can be mastered with practice. Using tools like nail striping tape helps create clean, professional lines even for first-time nail artists.
What are the easiest black and white nail designs to start with?
Classic striped designs are perfect for beginners. You can create horizontal stripes to elongate fingers, vertical stripes for a slender look, or diagonal stripes for contemporary flair. Polka dot patterns and simple geometric shapes are also excellent starting points.
How do I create clean lines in my nail art?
Use nail striping tape for crisp, professional lines in geometric and striped designs. This tool helps beginners achieve salon-quality results. Allow each layer to dry completely before applying tape to prevent smudging and ensure clean separation between colors.
What is negative space nail art?
Negative space nail art involves leaving portions of your natural nail unpainted, creating striking contrasts with black and white polish. Techniques include triangular cutouts, half-moon designs, and grid patterns that maintain a minimalist aesthetic while looking sophisticated and contemporary.
How can I create marble effects on my nails?
There are three main marble techniques: water marbling (swirling polish on water’s surface), dry brush marbling (using a nearly dry brush for subtle streaks), and sponge marbling (dabbing polish with a makeup sponge). Each method produces professional results and is accessible for beginners.
What tools do I need for black and white nail art?
Basic tools include black and white nail polish, nail striping tape, dotting tools or bobby pins for polka dots, makeup sponges for marble effects, and a nearly dry brush for texture. These affordable items can help you create various stunning designs at home.
How long do black and white nail designs typically last?
With proper application and a good top coat, these designs can last 7-10 days. The longevity depends on your daily activities and nail care routine. Using base coat and allowing each layer to dry completely helps extend wear time.